
Last Updated on March 15, 2023 by Ellen Christian
Learn how to make your own DIY ring holder box to store your rings. This simple DIY ring tray is an easy way to organize your jewelry.
Posts may be sponsored. This post contains affiliate links, which means I will make a commission at no extra cost to you should you click through and make a purchase. As an Amazon Associate I earn from qualifying purchases.
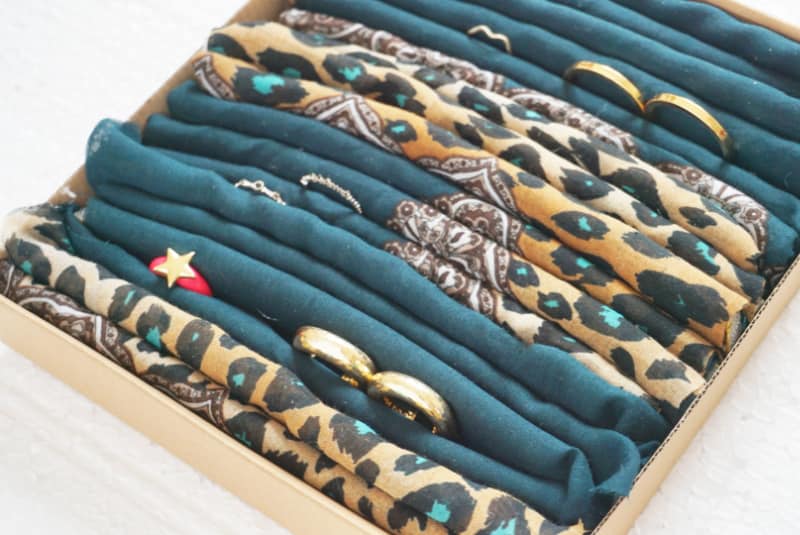
Table of Contents
DIY Ring Holder
Since I started reselling vintage jewelry, I’ve accumulated many rings I enjoy wearing and displaying. But, most of the time, they are hidden in my jewelry box, where I forget to wear them.
This simple DIY ring tray is a beautiful way to show off your jewelry and keep it safe from bumps and scratches.
I’ve seen cute ring displays made of old nail polish bottles and polymer clay. But, they only hold one or two rings. I have at least a dozen that I regularly wear, so I wanted a larger jewelry display box.
How do you make a jewelry tray?
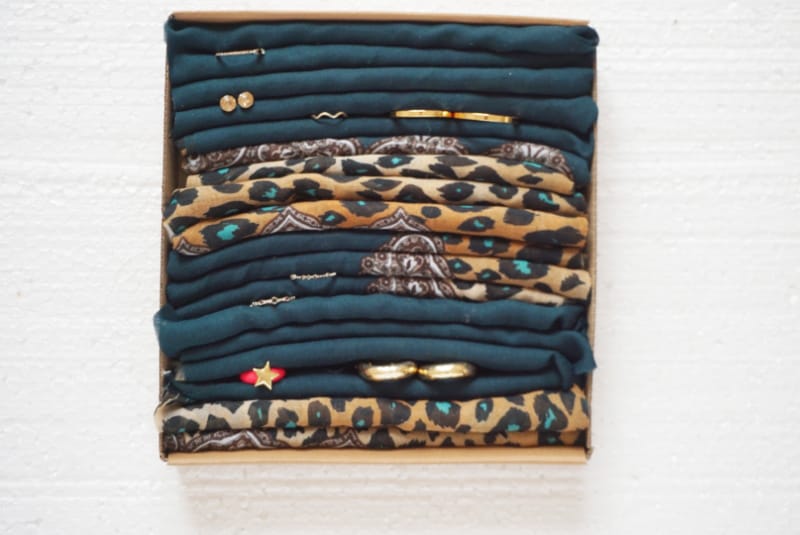
This easy tutorial will allow you to store at least a dozen rings. It’s easy to pull out the one you want.
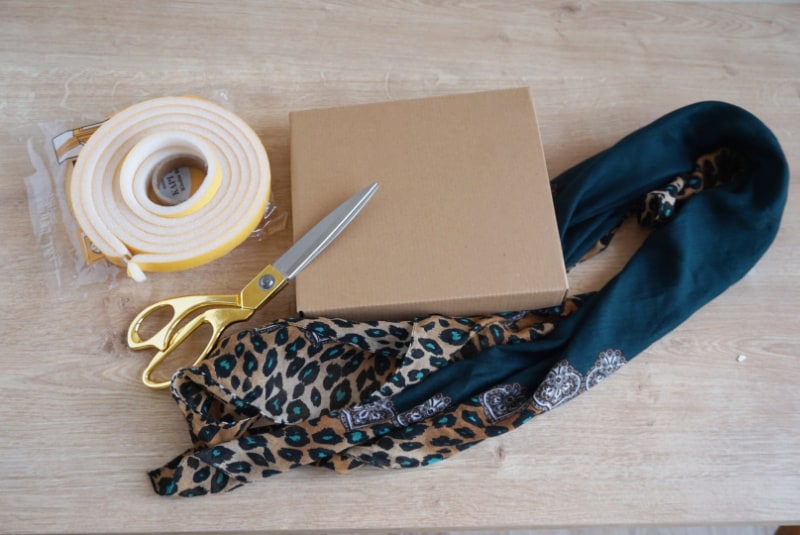
DIY Ring Holder Supplies
You should already have the supplies for this jewelry display craft around the house. This is a simple DIY project that lets you upcycle the craft supplies.
- Fabric
- Padding or foam
- Tray
- Pen
- Scissors
- Hot glue gun with glue sticks (optional)
You can search through your recycling if you don’t have a base for this. There are lots of upcycled art projects you can create.
What if I don’t have a hot glue gun?
You can use regular tacky glue in this tutorial if you need to. Just allow extra time for it to dry.
How to make a DIY ring holder
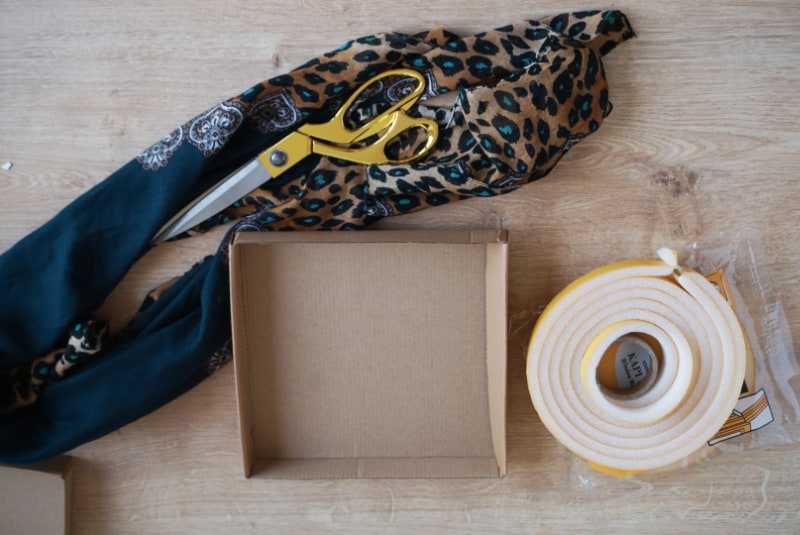
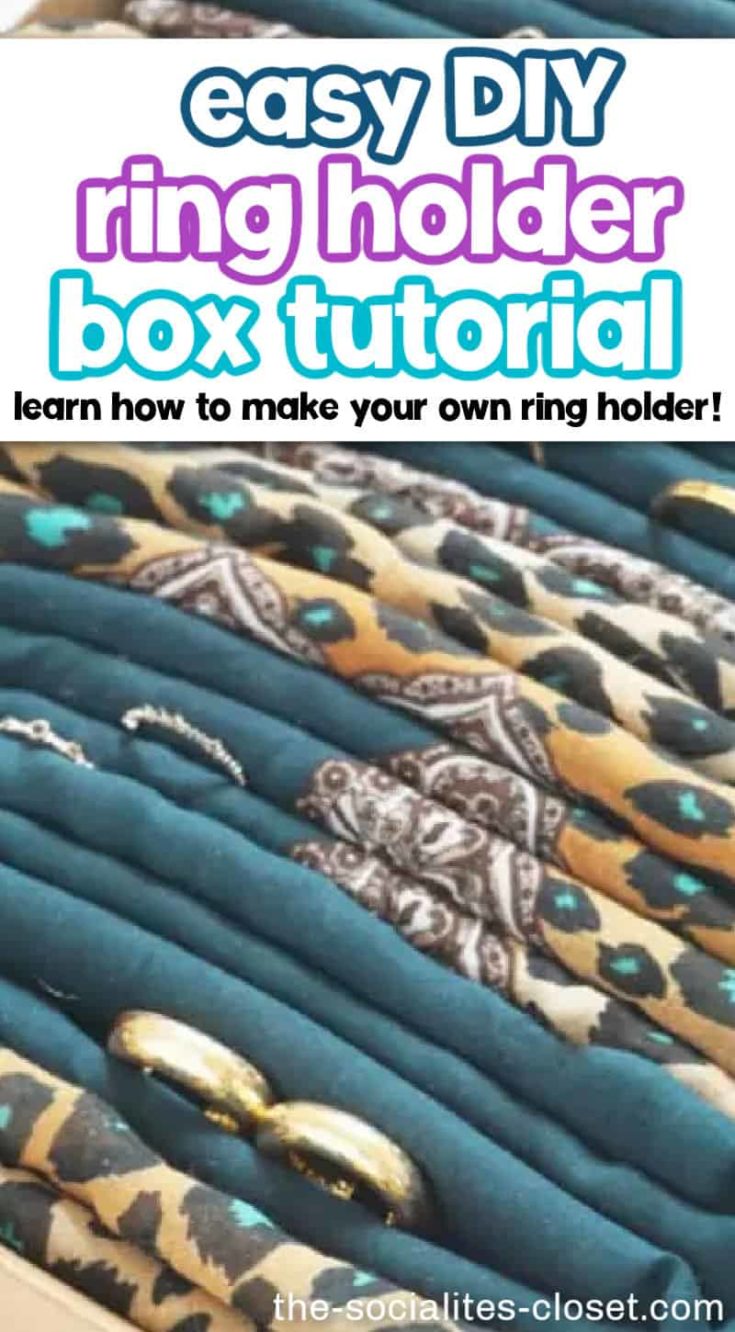
- Measure the inner width of the cardboard tray.
- Cut the foam padding according to those measurements.
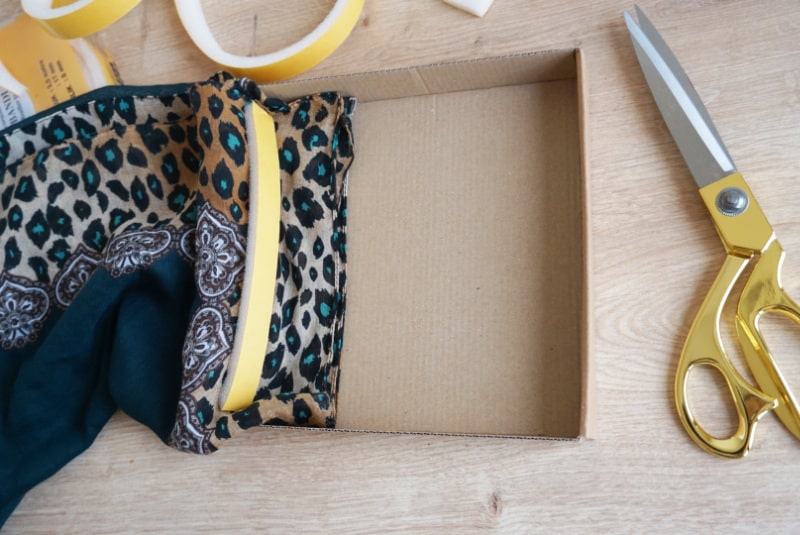
- Place one layer of the fabric and one piece of padding in the tray.
- Glue each side of the foam padding and weave with fabric into folds.
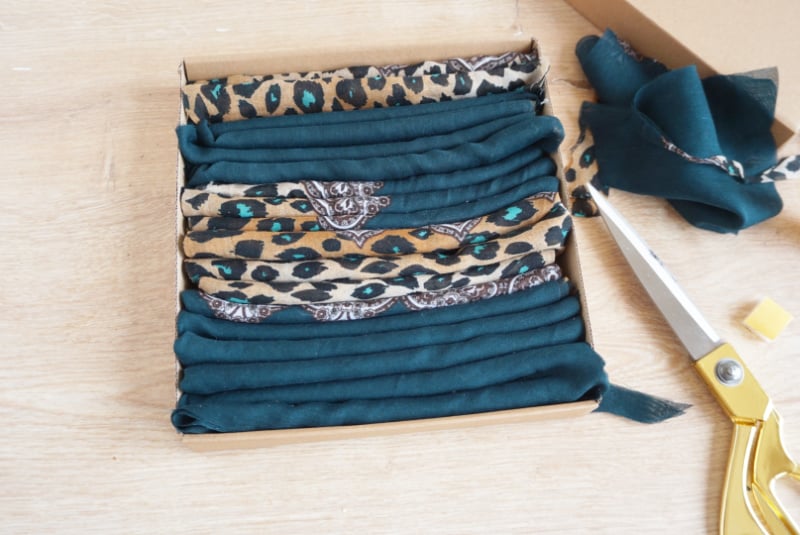
- Repeat these steps until your tray is full of zigzags of fabric and foam.
- Glue the final edges if you like for security.
Tips to upscale your DIY ring holder
If you have a pretty cardboard tray already decorated, you won’t need to worry about what it looks like. But, if your ring holder is plain cardboard, you might want to dress it up a bit.
You can cover it with one of these items:
- Wrapping paper
- Sheet of scrapbook paper
- Soft fabric like velvet or silk
- Pretty pattern scarf
If you are talented, you can paint your jewelry tray. Or another cute idea is to decoupage old greeting cards or ephemera to the tray.
This ring holder looks stunning on a marble counter. No one needs to know that you made it out of cardboard.
How do I use this ring tray?
Insert each ring in the small slits between the rolls of fabric. Don’t put the rings so close that they will scratch each other. Just push them in gently.
Where to put your ring holder
This is a pretty way to display your rings on a night stand, dresser, or vanity. If you prefer a clear dresser, you can store it in your drawer.
You could also put it on your bathroom counter to hold your rings while you wash your hands. This is a much more top edge display than a simple dish.
If you make your ring holder with a top and bottom, you can use it when you travel. You will just need to be sure the cover is one to protect your jewelry.
What else can I store this way?
You can use this same idea to display other jewelry like bracelets, necklaces, and earrings. You can even make a larger box for all your jewelry. This is a great way to see everything you have so you can use it more often!
Another cute idea is to make a mini version of this DIY ring holder. You don’t need a large box if you only have one or two rings.
The sky is the limit with this easy jewelry organizer idea!
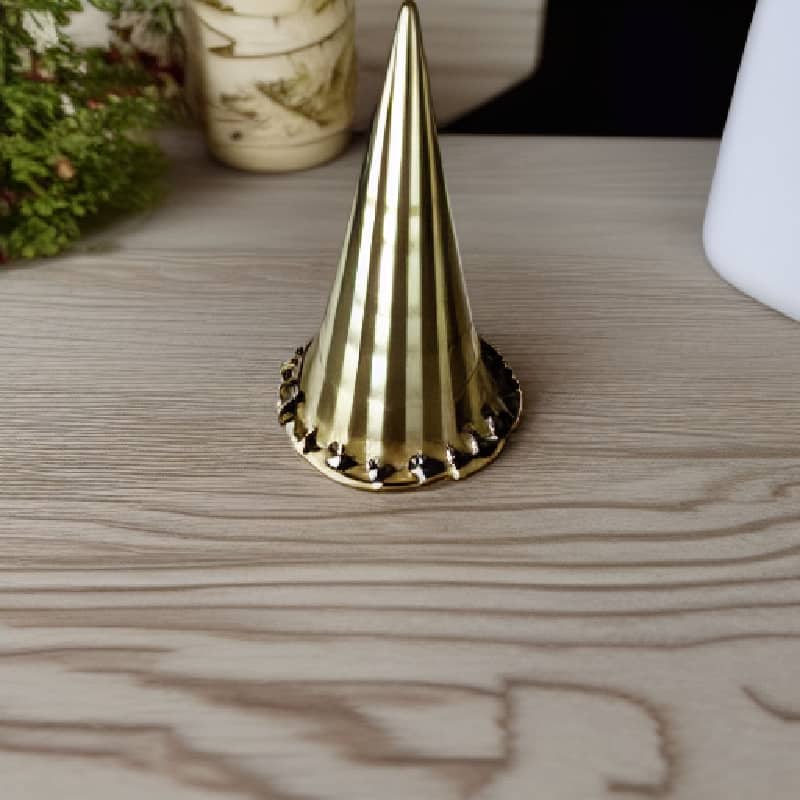
How do you make a clay ring holder?
You will need old nail polish bottles, polymer or air dry clay, and a knife.
Press the clay around the base of the bottle making a cone shape. Press the bottom out and decorate as desired. Using the clay knife, make gentle sits on the side.
Now that you have added all the details you want, it’s time to let your ring holder dry. If you use air-dry clay to create this, it will take about 24 hours to dry completely.
If you use a polymer oven bake clay, you will need to bake it in the oven according to the package instructions.
Once your holder is dry, you can paint it any color. You can also add glitter or sequins for extra sparkle.
Your clay ring holder is now complete! This is so much more fun than a ring dish.
I hope you enjoyed this jewelry organization idea and will make your own DIY ring holder soon! Create a few extra for gifts if you have enough supplies!
More crafts tutorials to try today
Use the search bar to find more fun craft ideas to create. Here are a few featured tutorial ideas.
- Air drying clay ideas
- DIY charm bracelets (this is so sweet!)
- Eye cover for sleep
- Build your own birthstone ring
- How to wear a claddagh ring
- Birthstone ring for mom
- Best earrings for a round face
- How to iron velvet
If you need my rings, you can shop by checking out the jewelry store in my header.
DIY Ring Holder
Learn how to make your own DIY ring holder box to store your rings. This simple DIY ring tray is an easy way to organize your jewelry.
Materials
- Fabric
- Padding or foam
- Tray
- Pen
- Scissors
- Hot glue gun with glue sticks (optional)
Tools
- scissors
Instructions
- Measure the inner width of the cardboard tray.
- Cut the foam padding according to those measurements.
- Place one layer of the fabric and one piece of padding in the tray.
- Glue each side of the foam padding and weave with fabric into folds.
- Repeat these steps until your tray is full of zigzags of fabric and foam.
- Glue the final edges if you like for security.

The Socialite’s Closet is a style and beauty destination created for women over 45 who want to feel confident, modern and effortlessly put together. Here you’ll find fashion inspiration, beauty tips and easy-to-follow styling ideas designed for real life.