
Last Updated on November 1, 2022 by Ellen Christian
These pumpkin nail designs are easy enough for a beginner to do. Check out this easy Halloween inspired nails tutorial to get started.
Posts may be sponsored. This post contains affiliate links, which means I will make a commission at no extra cost to you should you click through and make a purchase. As an Amazon Associate I earn from qualifying purchases.
I love fun nail designs for the holiday. Have you checked out this nude spooky Halloween design yet?
Or, you might want to try these simple Disney art ideas instead. I love Disney inspired designs.

Table of Contents
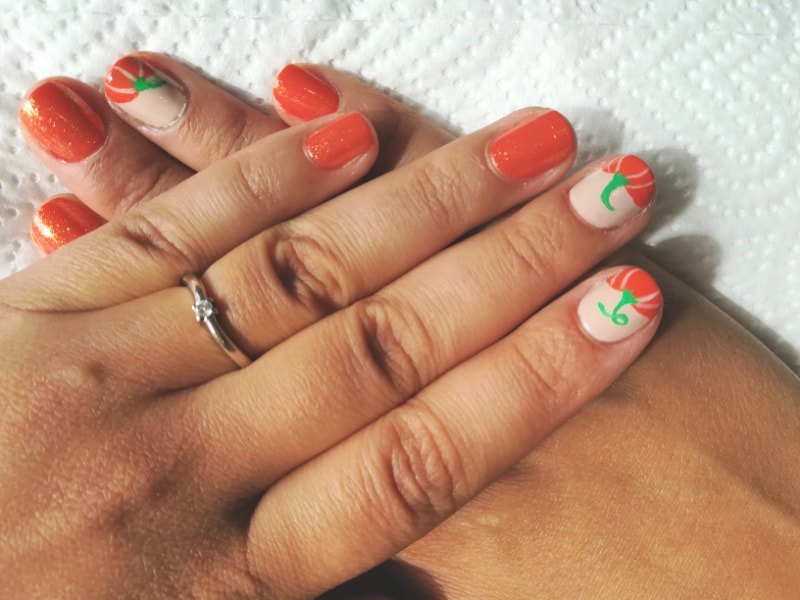
Pumpkin Nail Designs Tutorial
There are so many different pumpkin nail art ideas that would be fun to make during this time of year. But, I wanted to share something that would be easy enough for a beginner to make.
These pumpkin nails are so simple even a beginner can do the design.
How do you do pumpkin nail designs?
I decided to avoid Jack O Lanterns because that’s more of a Halloween design. Pumpkins can really go all the way from October through November so you can practice a bit before you get it just perfect.
Easy variations
So you can do this pumpkin nail design on every single nail f you want to. Or, you can do one or two accent nails and keep the rest orange or green.
A gold sparkly top coat is added to give your design a little shimmer. You can add it or leave it off if you’d rather. Try this design the next time you visit a pumpkin patch.
If you want to keep this understated, choose a pale peach color as your orange base. To make a more bold design, go for neon. Or, make gold pumpkins for something more upscale.
Supplies needed for Easy Pumpkin Nails
- Clear base coat
- Clear topcoat
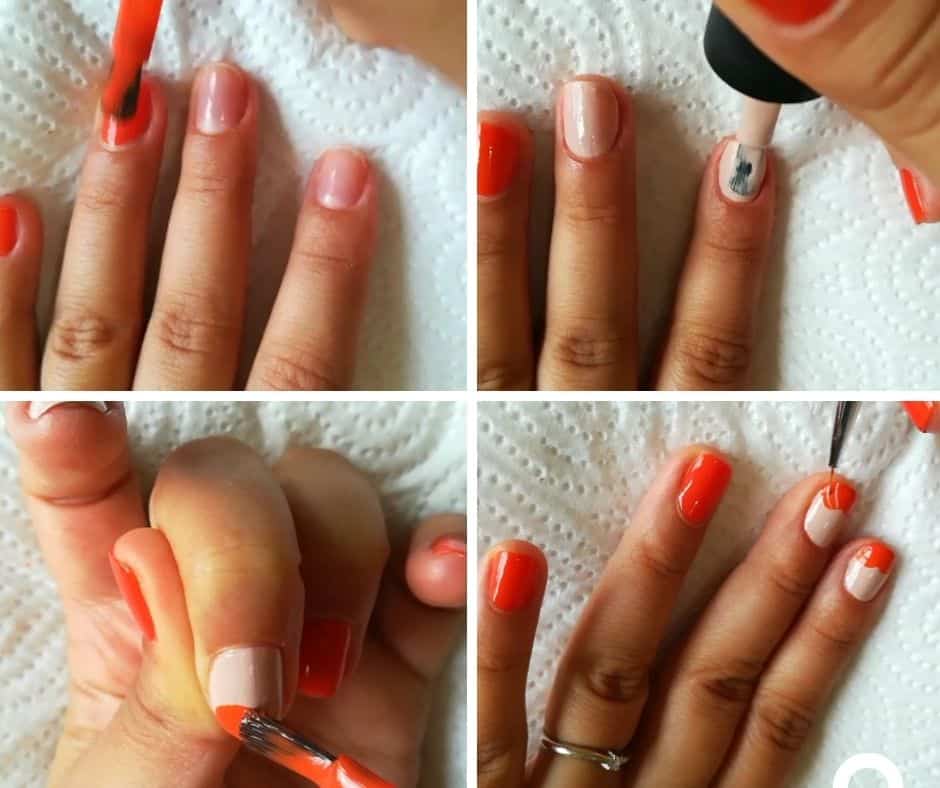
How to make pumpkins on your nails
- Apply a base coat on each finger.
- Apply a thin coat of orange color on your nails.
- Then, apply a thin coat of beige color on two of your fingers.
- After a few minutes, apply a second coat on all fingers for a richer color.
- Draw two overlapping circles with an orange color.
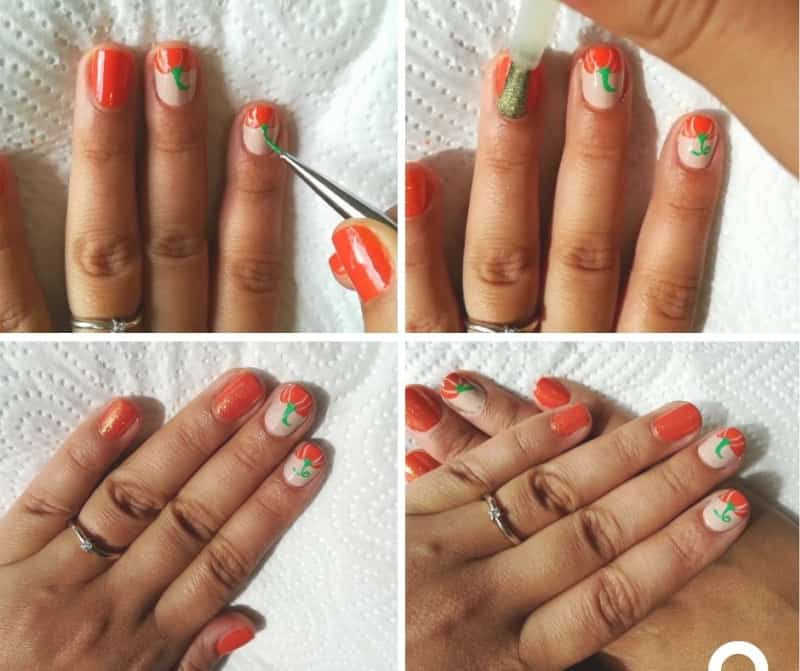
- Draw beige lines on the orange circles with a fine tip brush.
- Finally, draw a green stem with a fine tip brush.
- After everything is completely dry, apply a top coat on each tip to make the colors last longer.
Watch the video
If you want to see the entire process from start to finish, check out the video.
More Halloween designs
If you want more pumpkin art and other fall-inspired projects, check out these.

Can I make the design directly on my nails?
If you don’t want to use the beige as a base, you can make this pumpkin nail design right on your nails. But, it’s important that you use a clear base coat to protect them first.
As long as you use some type of base coat, the design should turn out fine. Or, if you want something that’s more dramatic, you can always use black polish instead.
Best press on nails
Finally, if you’d like to try press ons rather than make them yourself, I love these designs:

The Socialite’s Closet is a style and beauty destination created for women over 45 who want to feel confident, modern and effortlessly put together. Here you’ll find fashion inspiration, beauty tips and easy-to-follow styling ideas designed for real life.
Amazing!
And great, clear instructions.
Thanks, Michele!