
Last Updated on July 1, 2023 by Ellen Christian
I love all of the Halloween inspired nails I see on Pinterest, but I do not have the time or the skill to do that to my nails. Here’s a solution.
Posts may be sponsored. This post contains affiliate links, which means I will make a commission at no extra cost to you should you click through and make a purchase. As an Amazon Associate I earn from qualifying purchases.
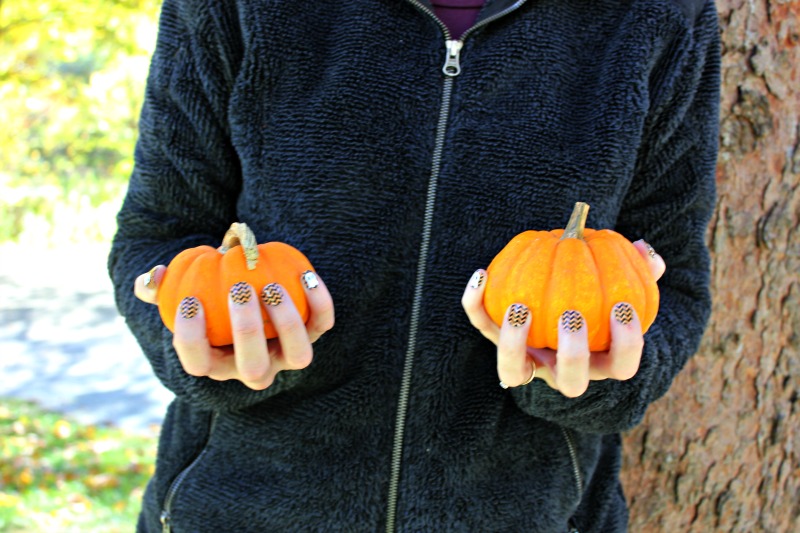
Table of Contents
Get Halloween Inspired Nails in Minutes
For a while, I just resigned myself to not having fun nails, but then I discovered Glossique and realized it was possible to have cute nails without all the fuss.
Here’s an easy nude spooky Halloween nails design you might want to try next. It’s very simple to do.
From spooky to sassy, Glossique’s nail wraps are a fun way to add some Halloween flare to your look. Glossique comes in regular and petite sizes, so you and your mini-me can have picture-perfect nail art in minutes. One of the best parts about

This product presentation was made with AAWP plugin.
Glossique nail wraps is they are SAFE, FUN, and EASY for children to use- there is no heating required for the application. They are chemical-free, durable, and simply peel off without damaging nails!
Halloween nail wraps
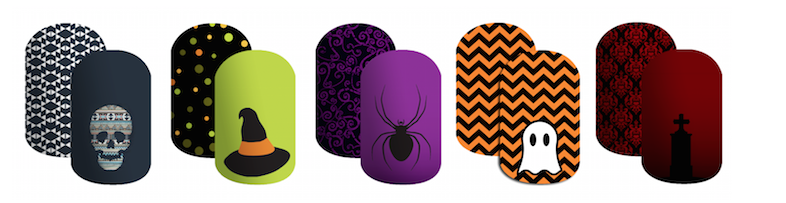
Glossique has five Halloween inspired nail designs that you need to try. Patterns: All Hallows Eve, Bewitched, Velvet Widow, Spooktacular, and 6 Feet Under. I received a few of these designs to try out, and they were so easy to apply!
Each package contains 19 decals which is enough for 3+ mani/pedis! You can cut each decal in half so one decal is really enough for two nails.
That means that 19 decals will do 36 nails. Like other nail decals, there are decals in a variety of sizes so you’ll have some for every nail.

This product presentation was made with AAWP plugin.
I love that Glossique has no harsh chemicals and doesn’t require a clear coat of nail polish. You simply push back your cuticles, wash your hands, and remove any leftover nail polish.
Then, find a size decal that matches your nail and cut it in half. Peel the decal off the card and start applying it to your nail starting at the cuticle. Press, trim, and file if desired.
Related Reading

The Socialite’s Closet is a style and beauty destination created for women over 45 who want to feel confident, modern and effortlessly put together. Here you’ll find fashion inspiration, beauty tips and easy-to-follow styling ideas designed for real life.