Last Updated on November 9, 2022 by Ellen Christian
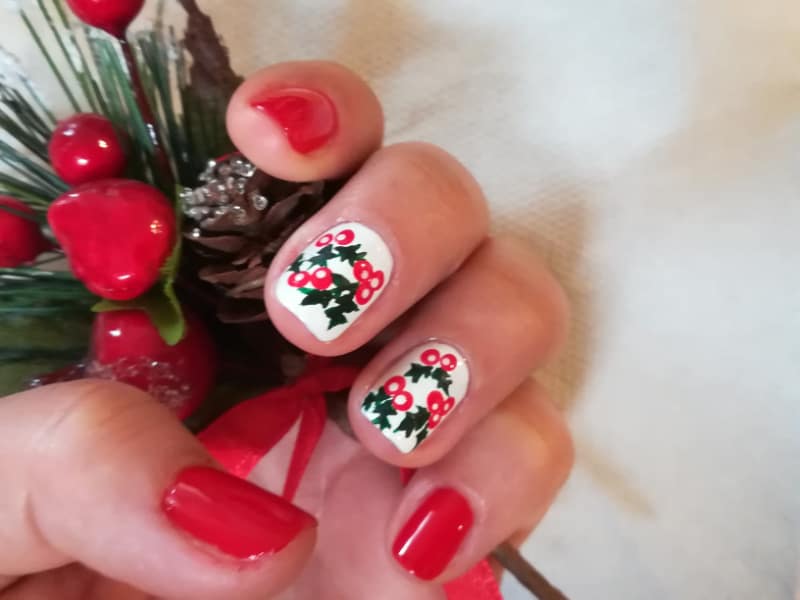
Check out these cute Christmas nails! I love cute Christmas nail designs and these are so easy even a beginner can do them without a problem.
Posts may be sponsored. This post contains affiliate links, which means I will make a commission at no extra cost to you should you click through and make a purchase. As an Amazon Associate I earn from qualifying purchases.
Have you checked out these Mickey Mouse nails? They are by far one of my favorite designs. Or, you might like these coffee-inspired nails for something a bit more neutral.

Table of Contents
Cute Christmas Nails
I used to really enjoy my trips to the salon to have my nails done. But, lately, I have been taking care of them at home. Sometimes I use ColorStreet because they are so easy to use when I want a more complicated design.
Other times, I just do my nails myself. There are lots of easy nail designs for beginners.
Tools / equipment needed
These are really pretty basic. So, you don’t need a lot of fancy tools to get started. This is what you need:

How do you do Christmas nails at home?
All you need are the same basic supplies that the nail salon uses. There are step by step instructions below. Or, you can check out the video if you want to actually watch the process.
Be sure that you take care of your nails and cuticles before you begin. I like to work this hand oil into my nails and around the cuticles to be sure they stay soft.
This cream works wonders if your nails are already dry and brittle.
If your nails get dry or brittle, they will start to crack and break. And, that will make it more difficult to do these cute Christmas nails.
Does this work for short Christmas nails?
Yes, you can do fewer holly berry clusters if you have short nails. Just adjust the number and placement that you do.
Or, if you want long Christmas nails, you can add more of them. It’s one of my favorite cute Christmas nails because it’s so easy to do.

How to do easy Christmas nails
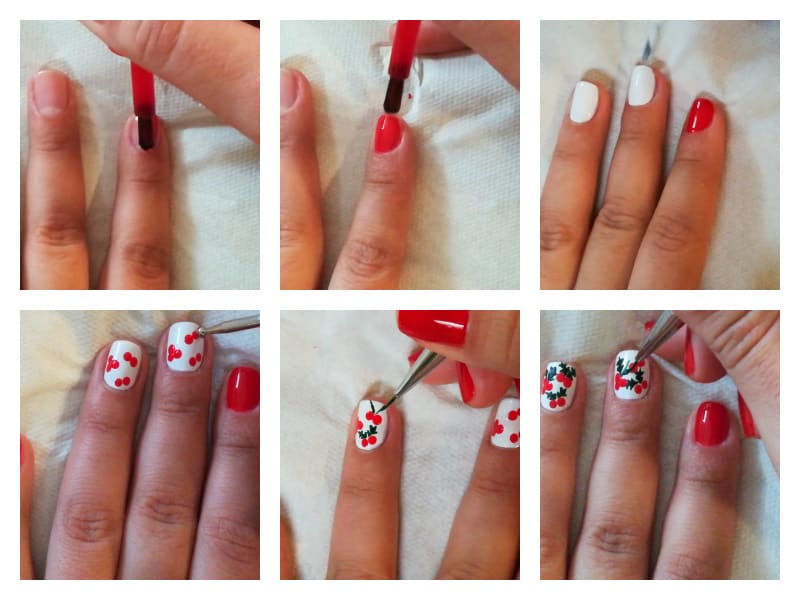
- Apply a base coat on each nail.
- Apply a thin coat of red color on your nails.
- Brush on a thin coat of white color on two of your nails.
- After a few minutes, apply a second coat on all fingers for a richer color.
- Draw red dots using a nail dotting instrument.
- Draw green leaves using a fine tip brush.
- Add small white dots inside of the red ones.
- After everything is completely dry, apply a top coat on each nail, to make the colors last longer.

Of course, sometimes I just like to add a few nails of glitter just to make my design a little bit more fun. Check out the Pure Ice Christmas Nail Polish.
And, while you’re waiting for all the snow to disappear, you might want to try a few of these cute nail designs for spring.
Cute Christmas Nails video
If you want to see the whole process from start to finish, check out the video.

Ellen believes you can feel beautiful at any age and size. She shares healthy beauty and fashion information geared toward women over 40. She is a direct sales rep for several fashion and beauty businesses.
