
Last Updated on January 5, 2023 by Ellen Christian
This negative space nail design is right on trend for those of you who are looking for the latest looks. When it comes to nail trends, Sally Hansen Global Color Ambassador Madeline Poole is the expert on what’s hot.
Posts may be sponsored. This post contains affiliate links, which means I will make a commission at no extra cost to you should you click through and make a purchase. As an Amazon Associate I earn from qualifying purchases.
This season, she reports that Negative Space is the trendiest and easiest nail art look you can create at home with Sally Hansen nail polish.
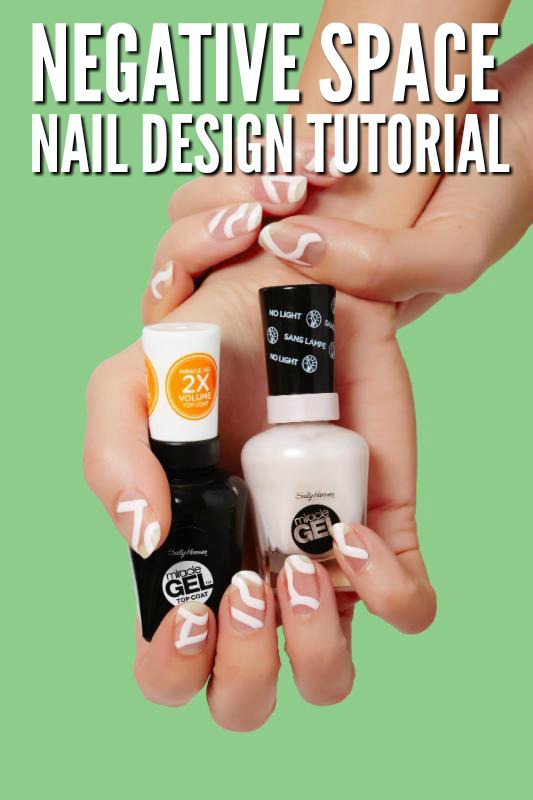
Table of Contents
Negative Space Nail Design
In art, negative space is the space around an image. In a black and white image, the item is usually done in black and the negative space around it in white. It’s a trendy design that you can often see in photography, art, and home decor.
“Fashion week Spring 2017 saw tons of nails in this style on the runway” reported Madeline, “such was the case at Proenza Schoeler and Vera Wang.” Negative Space design makes a feature of empty space and asymmetry. It’s something seen not only on nails this season but also in the collections of designers like Christopher Kane, who showed sheer paneled negative space dresses.
Supplies
The Negative Space trend is simple to create yourself. All you need is a regular bobby pin, Sally Hansen Miracle Gel in Creme de la Creme and Miracle Gel Top Coat. The #1 no light gel system, Miracle Gel will make your nails on-trend for up to 14 days of color and shine. See below for an easy step-by-step negative space nail art tutorial! I cannot wait to try these DIY negative space nails. I love being able to do my nails at home.
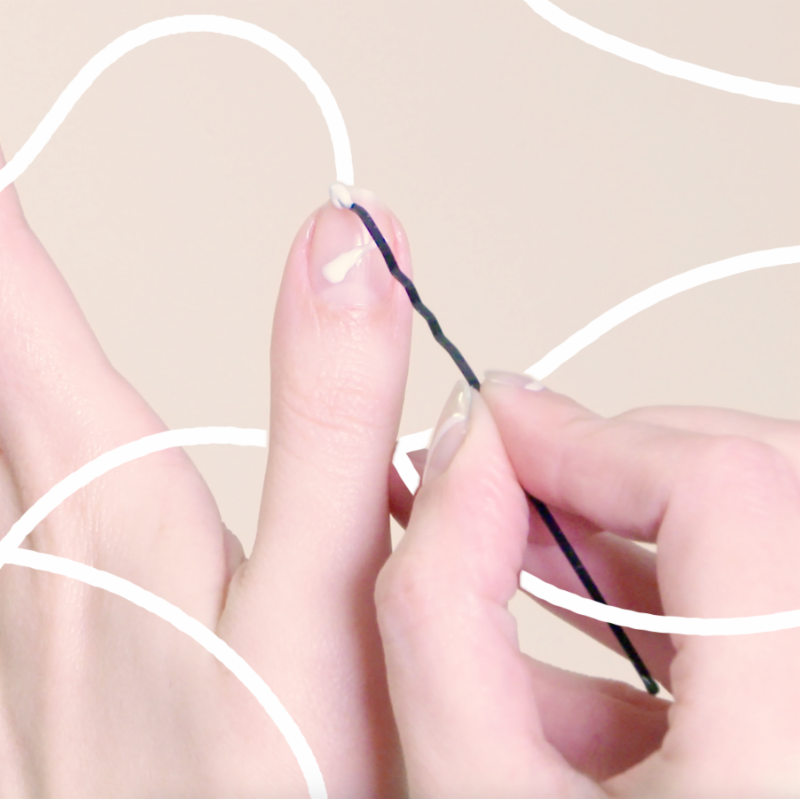
Step 1:
Starting with clean nails, apply the “Negative Space” design with Sally Hansen Miracle Gel Nail Polish, Creme de La Creme![]() to your nails using the bobby pin.
to your nails using the bobby pin.
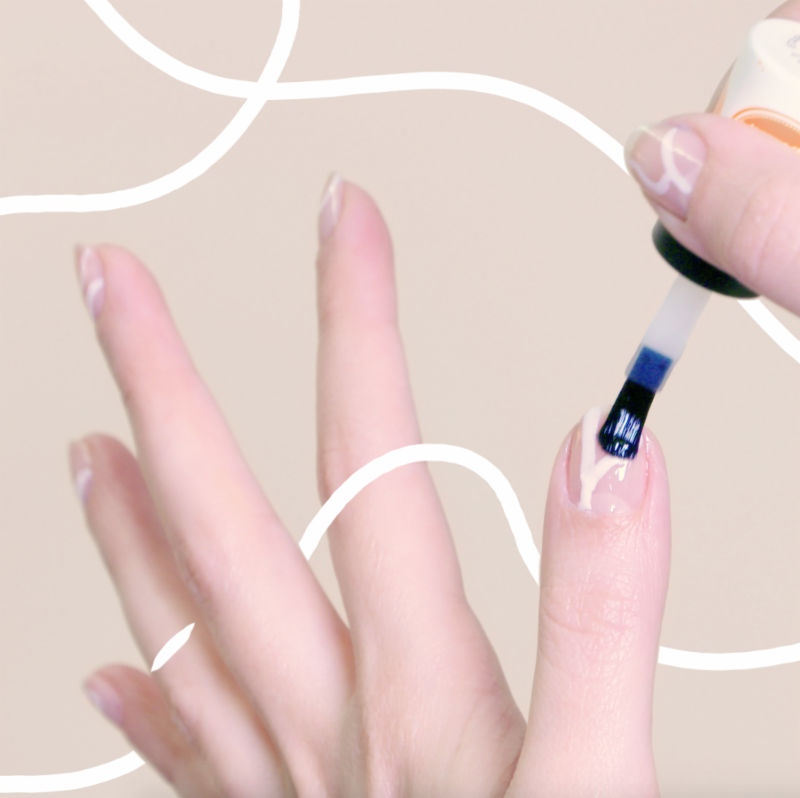
Step 2:
Apply a coat of Sally Hansen Miracle Gel Nail Polish, Top Coat![]() to seal your mani. It’s that easy!
to seal your mani. It’s that easy!
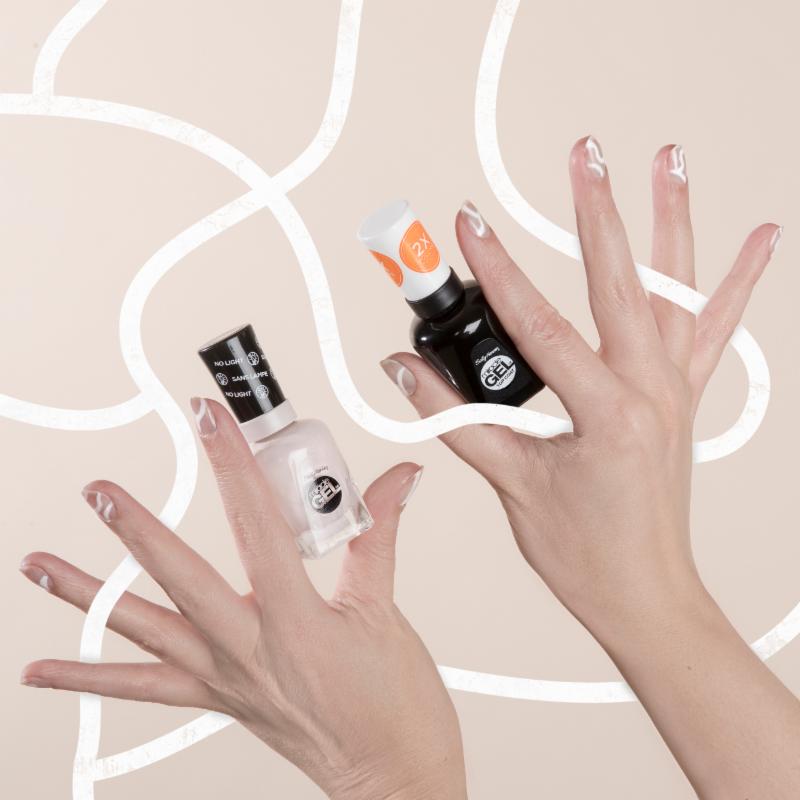
Now that you know how to do negative space nails, I hope you’ll give it a try. You may want to learn more about how to stop biting your nails once you’ve tried this new design.
Related Reading

The Socialite’s Closet is a style and beauty destination created for women over 45 who want to feel confident, modern and effortlessly put together. Here you’ll find fashion inspiration, beauty tips and easy-to-follow styling ideas designed for real life.