
Last Updated on July 19, 2022 by Ellen Christian
Wondering how to use Dermaflage? Dermaflage is a topical perfecting filler that will help perfect your complexion. Check out these tips.
Posts may be sponsored. This post contains affiliate links, which means I will make a commission at no extra cost to you should you click through and make a purchase. As an Amazon Associate I earn from qualifying purchases.
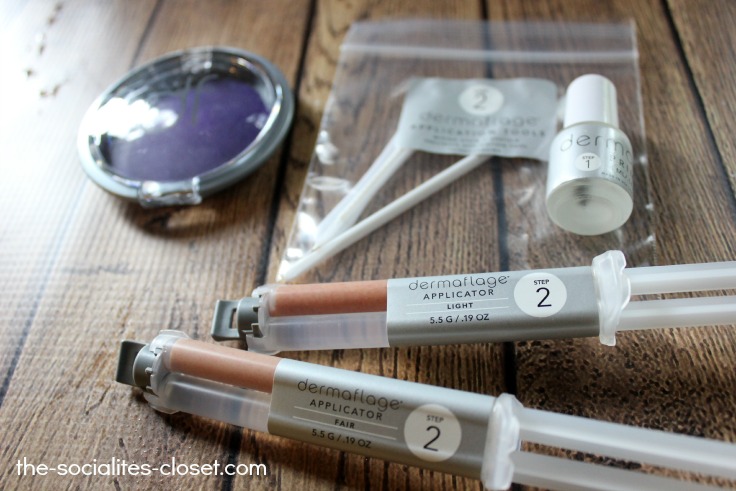
Table of Contents
Dermaflage Topical Perfecting Filler
If you’re anything like me, you have a few frown lines or acne scars that are fairly noticeable. Mine are in the center of my forehead. I like to think they are from concentrating but they are probably from frowning. If you’re a mom with two teenagers, you can probably understand what I mean. Either way, the first thing I see when I look in the mirror are those frown lines.
Dermaflage conceals recessed scars and lines in minutes and lasts up to 36 hours. Dermaflage is not make up. Unlike make up, Dermaflage uses silicone to fill in the scars and lines. It is a waterproof 3D scar concealer that matches to any skin color (6 color choices).
Unlike things like Botox, there are no injections involved at all. It’s totally non-invasive and not painful. Dermaflage uses a simple three step process.
Get it at a great price right here.
How to use Dermaflage
- Prime – Brush primer all around the area you wish to conceal. Let dry for 30 seconds.
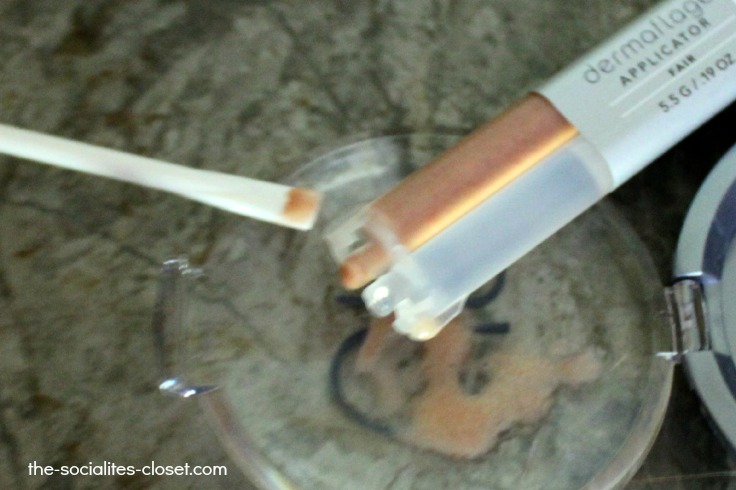
- Apply – Push a small amount of the clear and tinted silicone filler onto the lid. Mix them using the mixing spatula to combine. Apply a small amount to the skin and blend. You have 30 seconds until it starts to set.
- Texture – Place the texture pad over the area and hold in place for 30 seconds.
I was curious to see how this would work with make up. I almost never go out in public without basic cosmetics. According to the directions, you cannot use this with liquid foundation. After step one (prime), you brush on a powder foundation like a mineral foundation and then continue with steps two and three. I do have mineral foundations, they just aren’t something I use that often.
What do you get with Dermaflage?
When you purchase Dermaflage, you start with a starter kit. The kit contains approximately a 2 to 3 month supply of Dermaflage. The starter kit includes applicators of your chosen complexion, primer with brush and these tools: mixing stick, precision application tool and spatula, and texture pad.
Each starter kit includes one lighter shade and one darker shade to ensure it matches your complexion. I received fair and light. Fair was the best match for my skin tone. There is a 30 day money back guarantee for all starter kits and tone exchange is available if neither of the tones work for you.

I do like the end results of the Dermaflage. It was easy to apply and the directions were very clear. It did help minimize the frown line on my forehead. The starter kit has quite a few applications in it so I know that this is something I will be using again in the future. When you need to, you can purchase extra filler alone if that is all you need.
Get it at a great price right here.

The Socialite’s Closet is a style and beauty destination created for women over 45 who want to feel confident, modern and effortlessly put together. Here you’ll find fashion inspiration, beauty tips and easy-to-follow styling ideas designed for real life.
I watched one of their YouTube vids and learned how it works. I was curious of the cost and the end of the vid said $50 so that’s not too bad. I have a small scar near the side of my upper lip that I had permanent lip liner micro tatted on for only a few hundred, so that will last a lot longer, with no daily effort on my part! It hides it perfectly. I would love to try this for my marionette lines at the sides of my mouth. I don’t want to try fillers and they are so expensive and don’t last. Thanks for the review since I never heard of this.
Oh I meant don’t want to try expensive injectable fillers. This type of filler I would love to try!
Anderson Cooper tried Dermaflage!
This is better than having to have needles in my face. I need to try this.
I learned that Dermaflage was invented by a former Hollywood make-up artist and world-renowned facial prosthetic specialist Matt Singer. That tells you it’s done right!
I have never head of this before but learned that is has been allergy tested. good news for people with sensitive skin!